Cuckoo Buds 3 Column

Showing posts with label scrapping. Show all posts

Tuesday, December 25, 2012

Hello My Dear Friends! Merry Christmas!!


Oh my gosh, it's been so long since I've written, I'd almost forgotten how to get on, write and post to my blog!

I have been so busy - I visited with family all over the country through October, and then began a series of oral surgeries.  Why do we women always think, 'ah, not a big deal, I'll be up and around in a couple of days!'  Really a good question - it's because WE ARE WOMEN!!  When did we take time being sick, or lazy or down when our children, or even our grandchildren were really little - we didn't - unless we were half dead!  Which may be the reason things hit us so hard now.  But, I digress.  The last surgery I had was a 3 hour bone graft 10 days ago.  Doc explained, 'going to be taking bone from the back of your jaw and screwing it in here (showing me on ex-rays, like that's really English to me!)  If we need to - we'll take some from the chin area - ack!  Wait a minute, CHIN AREA???  Like - isn't that going to leave a bruise?  'Donna, you're going to have quite a bruise anyway, this is major surgery.'  Hangs head - me, that is.  Well, at least it was scheduled after all of my business meetings.  My sweetie is still taking really good care of me.  Tonight - Christmas night, I ate my first full meal - last one for a while because I'm in a lot of pain now, but it was yummy, and I did get to help cook most of it.  We were able to laugh a bit throughout this entire process, no talking really because at first I sounded like Scooby Dooby Doo, then like Sylvester the Cat (still do when my mouth starts to hurt because my tongue swells badly.)  But we go on - life is good, it's wonderful, today is the day our Lord and Savior was born to save us all!

Our garden still has it's lovely visitors - even though we have had many nights at 25 degrees.  Because we are so close to the coast, we still get many, many hummingbirds.  They must know how much we love them, as we are still feeding them at the rate of - - - drum roll please - - - one half gallon of sugar water A DAY!!  We have two feeders up, about 10' apart or so, and they love our home we have for them!
It's really something to see so many birds feed in our yard, and then our neighbors for a block in all directions my get a stray bird once in a while.  The only thing I can think it could be is water.  They will not feed on tap water.  Ours is reverse osmosis and they'll drink regular water if it is boiled, but most people won't take the time to do that for them.  It's so worth it for us!

We have about 2 months when we have no birds at all, and take the feeders down - usually January or so, then one will go up for a month around March, then the other goes up shortly after that.  At first, we will get One male who will try to lay claim to the feeder - but when all come
home, and hundreds are here, there is no room for bossy boys here!  They say they come back to the same feeding area each year, and I must say, each year, we have had more and more birds.  Feeding one half gallon of sugar water a day is feeding a lot of birds - and they are a joy to watch.  These are the two feeders we have.  The blurs are 'birds in flight!'

Have you all been keeping your crafts up?  It's so much fun to create something with our hands!  I've been making tons of journals.  I love making them for gifts.  I can't seem to find my folder that has all the photos, so here's the latest one I made.  I made it for one of the ladies in our Daughters of the American Revolution chapter as a Christmas gift.  I loved having a tree, symbolizing the 'family tree' aspect of the group!
Then, as always, I have a crochet project in the works.  My friend told me of this pattern, though she never knew the name.  She said, 'all you do is double crochet 10, chain 10, until you have the length you want, then I'll show you how to twirl and tie it up.'  You know me, I'm always game for something new, so I double crochet, chained 10 to what I felt was a comfortable width, and length - it looked like this -


Then twist the chain 10, pull through the next chain 10 and repeat until all are finished.


It's actually very pretty and looks as if it's braided strands and not twisted and brought through. 

When all are twisted and brought through, I went around the entire afghan twice in a very nice half double crochet, placing 3 stitches in each corner to have it lay straight.  The color scheme I used was a variegated with dark brown, medium brown, orange, tan, and beige - 6 colors total.  The pattern was 5 rows of each 6 colors, 3 rows, 1 row to the variegated and then 1 row back, 3 back 5 back. 
The colors came out beautiful!  The size was a bit smaller than I first thought it would be, but never making it and not having much to go on, it's great.  My next one will be twice the size, as this is just for one.  But, it was given today to my newest granddaughter - my grandson was recently married and they are expecting their little wee one on March.  This will keep her nice and toasty.  The fringe was a new one for me, a triple knot.  I really like it, for fringe.  Only on one end.  I prefer no fringe because it always tickles or makes me think something is crawling on my neck when I'm sleeping.  But, it was a gift, so I fancied it up.  I read a pattern on Pinterest some time back and they had a variation of this as a ripple and called it Jacob's Ladder.

Also done a bit of sewing.  My little Wee One, Leila, asked for a Yoshi blanket for her gift.  So how does one make a Yoshi - well, first buy the material, then take it all to Colorado to my daughter there and ask her to help!  My son married an Angel and she sews like a professional, so she helped me.  Son made the Yoshi pattern, I cut, daughter did sewing - a family affair!

She loves it Auntie Kim!!  Thanks Uncle Jeff for helping, too!  And yes, each piece is sewn on separately!  It was a lot of pieces, a lot of work, I can't thank Kim enough as she has this beautiful, professional sewing machine that really hit the mark! 

These are my kids who do costuming professionally.  She does the sewing of costumes of fabrics and leathers,


he does all of the props or items fabricated in different metals or plastics.  They are an amazing team together!

And, so with that my good blogging buddies, as Yoshi to the right is ready to say good bye for now - I promise it won't be another 4 months before I stop back by.  I do get by to see many of your blogs, but have just not had time, as you read to leave messages.


May God bless each and every one of you, keep you safe, loved and forever thankful we live in the greatest country in the world. 

For those who have soldiers away from home, God bless you and them.  Thank them and thank you for your service to our country.  Without them standing on the front lines, keeping our liberty and freedom, and you all keeping the home fires burning, we would not live in the greatest country any longer.  God bless you all.

May you all have a wonderful, healthy, and Happy New Year!  May it be all you want it to be, bring you the happiness you deserve, the prosperity you work for and the health our Lord bestows on you.  This new year I look forward to better health, a brand new Great Granddaughter (Grandson and new Granddaughter will be having her in March) and a wonderful new year.

Blessings and hugs,
Donna


Saturday, July 21, 2012

A Journal To Cheer A Friend

I so enjoy crafting and making cards!  One of my DAR Sisters fell and fractured her ankle and was hospitalized a few days, now spending time in a Rehabilitation Facility to help her get back on her feet a bit faster.  I made this pretty little Journal for her.


I thought a journal would be nice for her to be able to write daily notes, keep track of visitors, cards and flowers or gifts!

These flowers are again from Wild Orchards and are two toned with a deep rich burgundy while the rose goes from dark to light pink

Thought it was pretty, but needed a kick of color - when I used the burgundy velvet it was too little, when I used the big pink it looked too plain BUT together Wallah!


Threw in some pearl sprays, a bit of gathered lace along the edge of the journal a row of pearls on top!  So pretty!


Hard to see here, but I also added a nice long piece of ribbon as a book mark or place mark.  I glued it in by bending both front and back covers together poured a bit of glue down the books middle behind the binding.


I wish you all cooler days, breezy nights!


Blessings,
Donna 

Saturday, May 12, 2012

Introducing A Wonderful Friend ~

Many of you already know June, to some she may be a new friend ~ What I would love to do is introduce or reintroduce her many fabulous blogs!  This woman is so talented, and such a wonderful friend to all!   And there are tons and tons of new things to share with you about what has been happening in her Art World!!
Many of the items on this Website are free, some are $1, $2, $3 ... for tons to use as you please, as many times as you please!

So who is she?  June is a wonderful and creative woman who found images old and new of every thing you could ever imagine wanting to use in your creative art collection!  She has taken images, post cards, photographs and the like, cleaned them up and made them new.  Some have color added to them for interest and beauty!  

Now, this is a very simplistic explanation of what she does, because I don't know about you, but I have enough trouble just taking a photograph that is perfect, copying on to my computer and inserting into a work of art, much less taking something maybe 100 years old and making it look both old and new at the same time - hard to explain - so head over to Dezinaworld  Olde Curiosity Shoppe where you will find hundreds and hundreds of images ~ Vintage; Backgrounds and textures: Fashion, Flowers, Plant, Trees; All things French; Steampunk; well ~ starting to get the 'picture' here? June literally has almost everything, and if she doesn't, she will venture to try to obtain it for you!  Oh, did I forget to mention all of these beauties are free?  Yep - June has done a ton of gorgeous work, and it is available for free.  (You can of course make a donation to keep this kind of work available, and new work coming.)

Do you make cards?  Scrap?  Altered art?  Jewelry?   Make collages?   Love to incorporate old with new? Take a look at what some of the other designers have done, along with June's own work and let me know what you think?

As if she's not busy enough, here's another Blog ~ and WOW ~ gorgeous work here!
ARTY RETREAT

June's talent has also been tapped at a new Blog as a member of the Design Team of "The Game"  This one I can hardly wait to see the work done, for most of these ladies on the design team are disabled in one form or another - but they are going  to teach the world what I try to do each day too, is that they are ABLE!!!  I cannot wait to see what they design!!!
So ~ there you have it!  My introduction, or reintroduction, of a wonderful woman, excellent artist, and a something of interest for everyone!  Join me in following all of June's ventures, and learn from someone who loves what she does and shares everything she can with fellow artisans!

Blessings to all, may you all have a wonderful and Happy Mother's Day!
(((HUGS)))
Donna 

Sunday, March 18, 2012

Unusual Items To Re-purpose For Cards and Scrapbooks

I try to 'repurpose' as many items as possible.  Re-purposing is a fancy way to say "Recycling" but we don't have to use government standards to label items . . . yet.

I've shown in a few of my cards, scrapbooks and albums, my pocket pouches I use to put tags for journaling, photos or just pretty tags inside.  This is not my original idea, I don't know who's it is, but it's great and has been around for many years.  First saw it about 10 years ago.  It's a perfect size, easy to cover and decorate, and FREE - so can't beat that!  Last week when I posted my Anniversary Book for friends I had a couple of requests to explain how to do this - so here are the easy peasy directions.


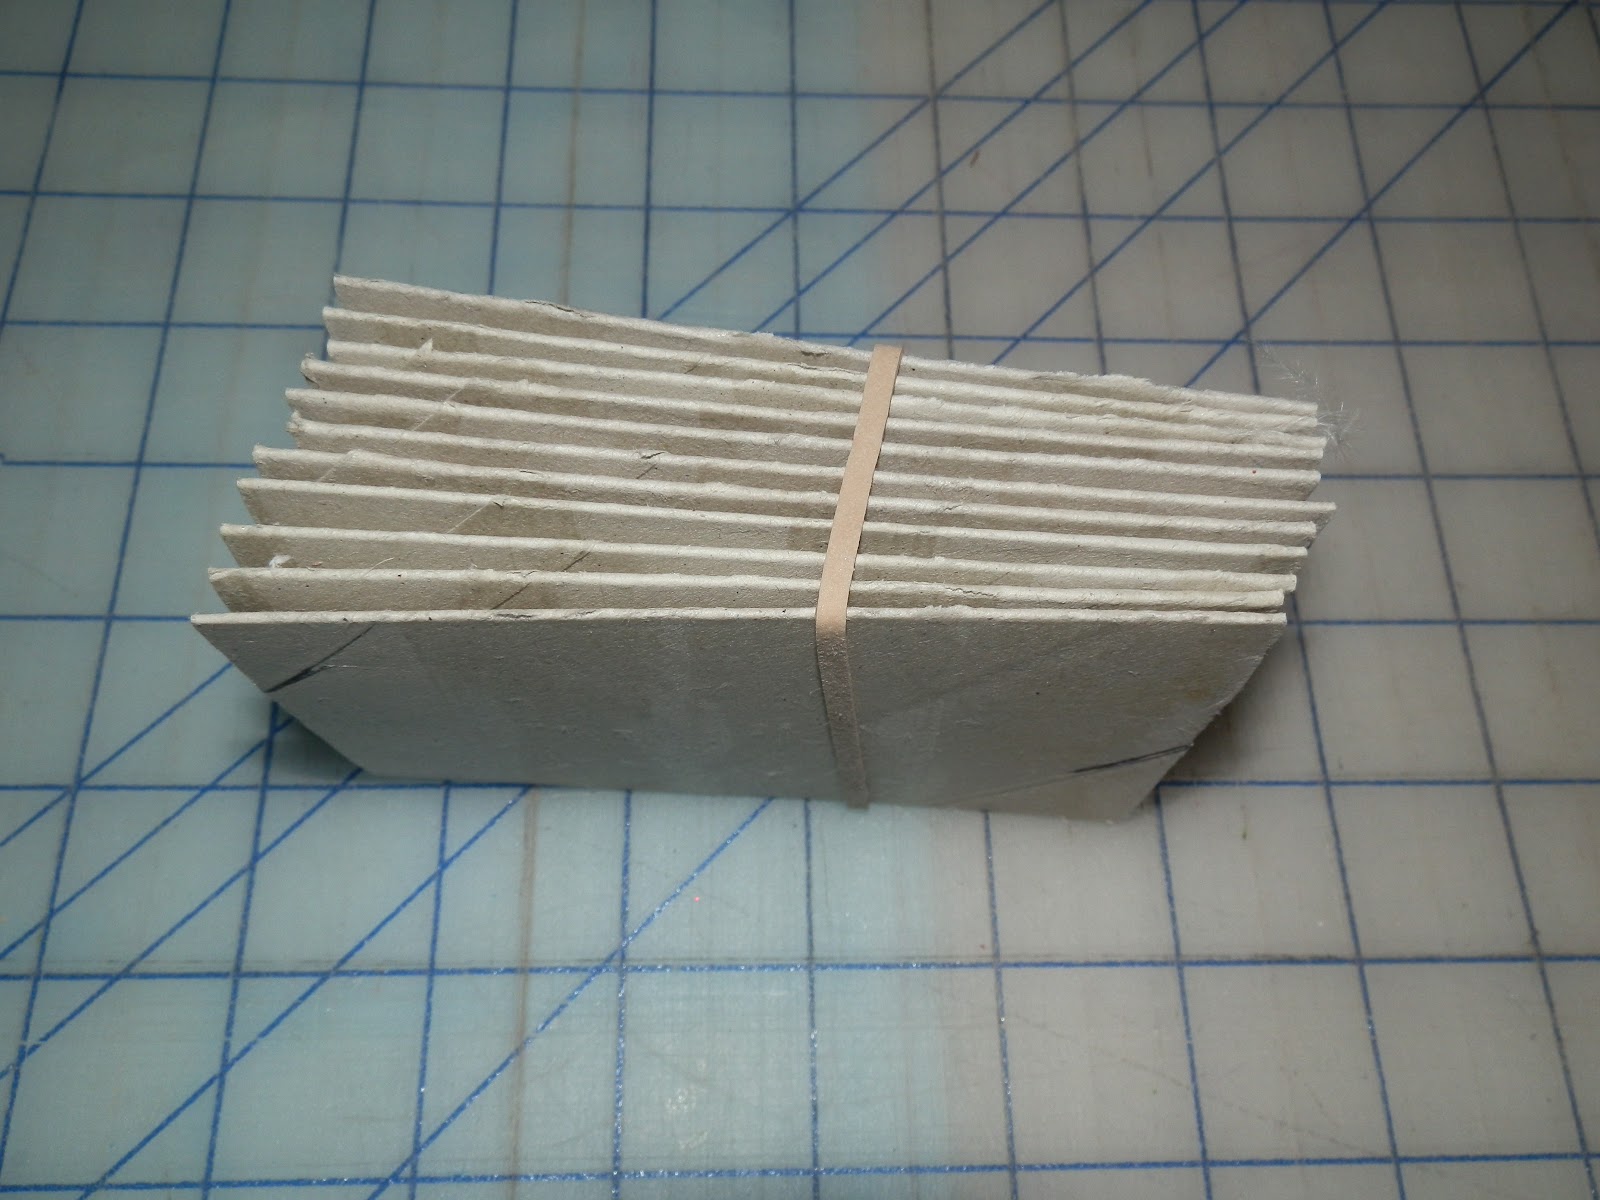
First, save the rolls from your toilet paper - brand doesn't matter.  The only thing required here is thinking ahead.  I've also used empty paper towel rolls and cut them to size.
Next, I use the first of two high tech gadgets for this project - an old (but cleaned before using on paper crafts) toothbrush!  Pick off as much of the big pieces, then gently brush off the remaining paper.

 Mark where the ends of the roll meets and make sure they aren't on the fold, gently press down.  I have arthritis in my hands and wrists pretty bad, so this is where I use my second high tech gadget ~ an old rolling pin to get a nice crease in the cardboard!


Well, it gives a nice crease, but I need for it to go from this (top) to this (bottom,) what's a scrapper to do?
We improvise!  Now, this is not the only time I use an iron - in fact, this is my craft iron and craft board!

Use a hot setting, but not on steam - NO WATER  on the paper and you will want to press hard and quickly because remember, this is paper!!  So press for a few seconds, pick up the iron, another few seconds until you have a nice flat pocket and no longer a tube.  "Why not go right from brushing off the paper to the ironing step?"  Great question!  There is 1 out of every 4 tubes that need a tad of glue on the inside and if you just go for the big squish and go from taking 4 minutes to 2 minutes (this is really very quick to do!) chances are you will end up with more that need gluing and it is so much easier to glue them before they are flat!  And, for gluing, I use an ever so tiny dab of glossy accents.  Use whatever you use, but only a very small amount, let dry and then move to the next steps.
 So ~ here we are ~ time to have fun!!
I usually have enough made up in advance to put pockets in cards when needed or make little scrap books.

 
Measure roll, mine are 4 1/4" x 6" by the time you roll it around.


I love my Xyron for this step or even spray adhesive, glue or tape ~ whatever you have and use. Roll the tube, carefully aligning the paper and the tube.  I use my high tech rolling pin again to make sure all of the air bubbles are out of the adhesive and it is on good and tight!

Before decorating, I  punch the holes in the tube.  If I'm making a TP Album, I use my Zutter Bind It All.  In a Book or card for a pocket, I would use my Crop A Dile or a hole punch.

This was my first tutorial!  I hope it made sense, and you are able to make your own pockets and Mini Albums!  I had a lot of fun!  Thanks so much for popping by!

Blessings,
Donna

Wednesday, March 14, 2012

Happy Anniversary to Our Good Friends!

I made this special Anniversary Memory Book for very special friends.
This black paper was hand made by a local artisan who no longer does this, but it is beautiful and has silver embossments.  I made the flowers with coffee filters and put red stickles on the edges.  Pearl sprays, white feathers
and tons of fibers and ribbons,
which I love! 
I save or make all kinds of little trinkets all the time, like the hearts - I found an easy pattern using embroidery floss, which I have a ton of from a garage sale, and of course, while I do not embroider, I figured, " might need these for something!"  These are of course crocheted!  I made them about a year ago and they've been waiting for a project!  A pearl in the middle and - pretty darn cute!  Two small, one large!
I made tag pockets throughout the project on each page, photos or journaling can be added! 
I also love recycling toilet paper tubes for pockets in small scrap book albums.  The are easy peasy to make, cover, embellish and the perfect size for a tag!


This page came out adorable!  The little watch is a broken Christmas ornament which I covered with a nice clock face, adhered to a pocket, with tags "forgotten memories" and "key to the past" with another pocket!
Next two pages are a map of the US - right side, both growing up on the East coast, the tags outside the pocket are "family" near Pennsylvania where she was born, and a "Cleveland Indians" logo near where he was born in Ohio.  The Home Sweet Home and a crocheted "Monarch" Butterfly on the left side where they now reside on the West Coast in Pacific Grove - the Monarch Butterfly Sanctuary.

Another toilet paper tube, covered, embellished and used for tags.  Such an easy way to add both decorations and tags. 
My favorite two pages.  I used old dictionary printed paper and all of the words relivent to their lives I highlighted, "memory," "love," "family," ...

 added wild roses and green bead strands, pockets stuffed with tags and a person sentiment from  us.


This couple is very special to us,  and our wish for their anniversary is they live
"HAPPILY EVER AFTER!"

Thanks for taking a peek at my special Anniversary Scrapbook!
Blessings,
Donna