Cuckoo Buds 3 Column

Friday, March 30, 2012

I Love Making Cards ~

I really love making my own cards.  Whether for birthday or holidays, it's so much nicer to make some "just for the special person" I am mailing it to.

A special friend of ours has had trouble with his eyes and without going through all of the details, it's made it difficult for him to see.  He feels the details of my cards with his fingers.  This is something I love doing anyway, but when it means something special to a friend, well the significance is even greater.
I used a K&Company "Brenda Walton Designer Paper" pad, this particular sheet of paper was a duplicate of the front cover of the pad.  I cut out the matching butterfly and flowers, used Glossy Accents on them, popped them up and gave them some definition.  The butterfly also has the glossy accents, but I only glued the middle of the butterfly.  I folded the wings before putting on the glossy accents. 
Some of the new paper pads are double sided, seemingly better for color coordination.  Do you ever make your sentiments personal, instead of just stamping on paper?  Using vellum, leaves a crisp message and you can see through to the paper!  I run it through my Xyron and it really looks nice!
 
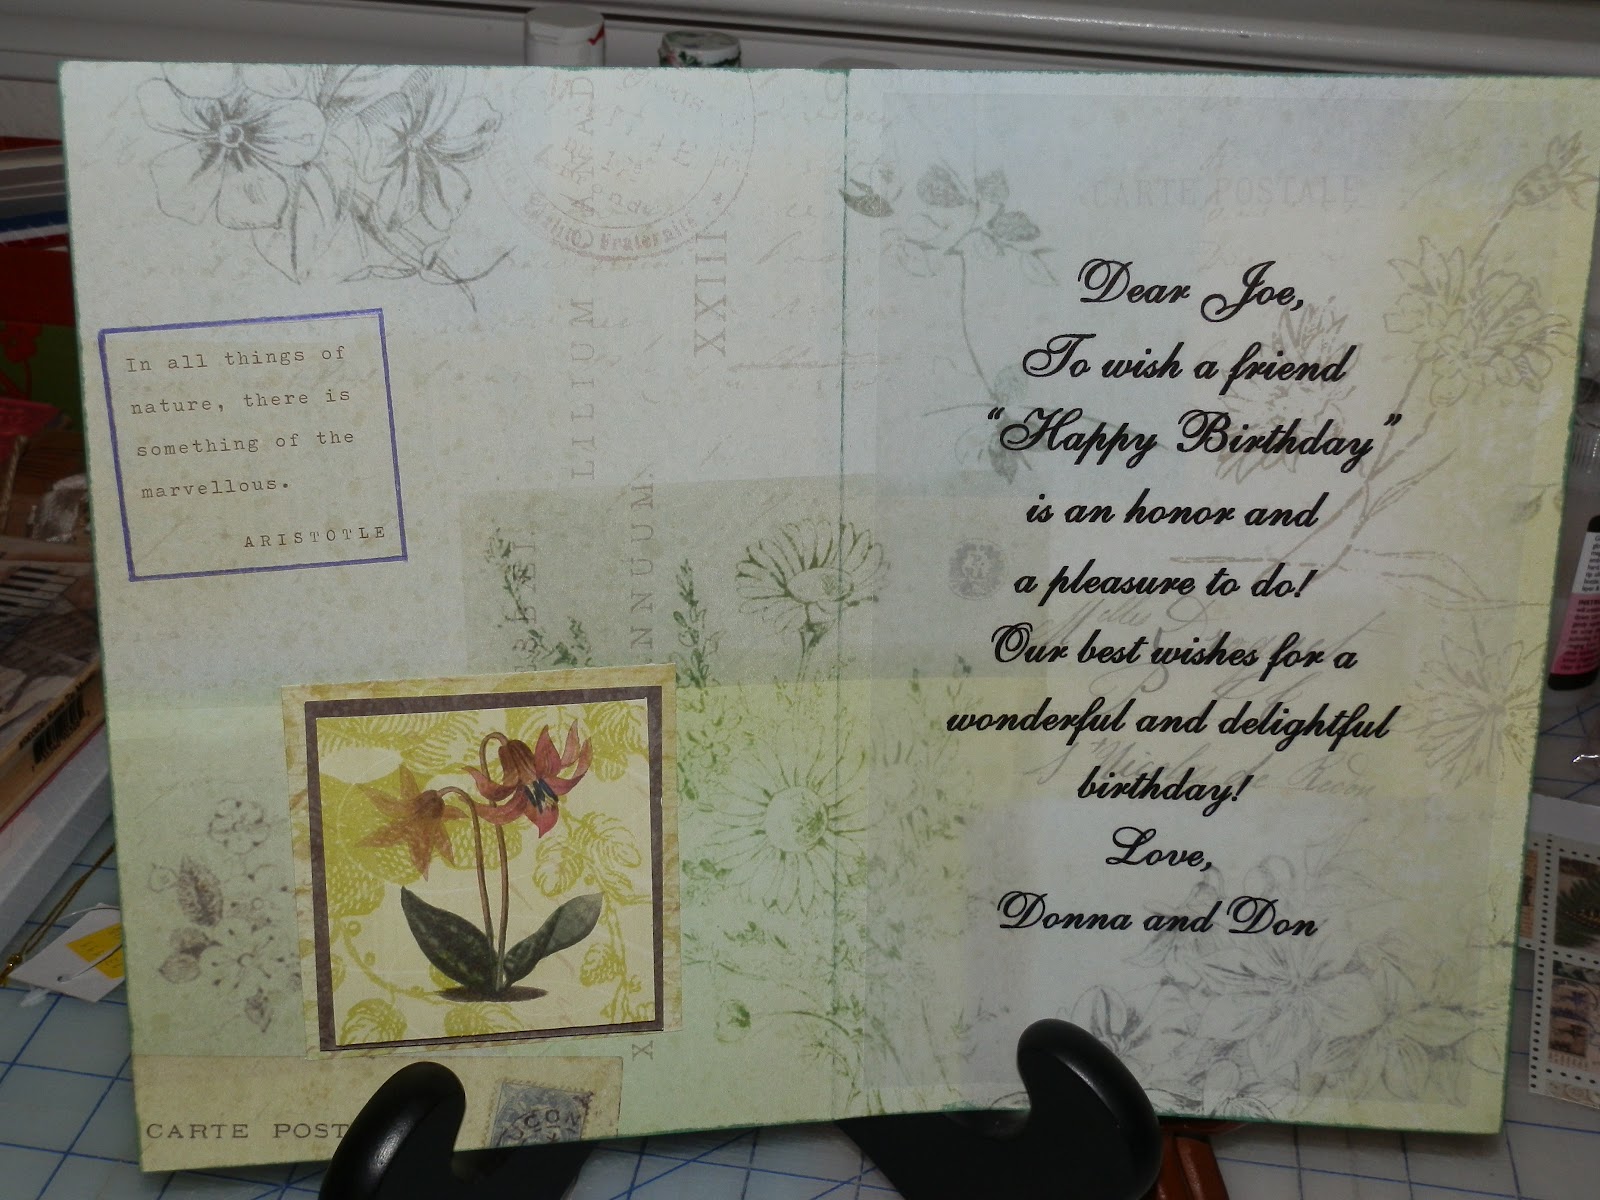
All I did with the Aristotle quote is outline it, as it was already printed on the opposite side of the paper!  Instant embellishment!

The matching flowers were cut out, triple matted, popped up and put on the inside as well!
Thanks for taking a peek, I wish you all a wonderful weekend and the beginning of Holy Week.

Many blessings,
Donna

Saturday, March 24, 2012

~ Monterey Bay, California ~

For over 30 years, our home was 15 minutes or less from this magnificant beauty!
These two photos were taken in the parking lot of the Monterey Beach Hotel, the first hotel allowed to be built on the beach in the Bay.  I worked here for several years.  First as the Executive Secretary for the General Manager.  Then as Assistant to the Owner of the properties.   Yeah, this was a tough place to work!  I had lunch every day overlooking this beauty!  These photos face west, and south west.
This was taken from the other side of the Bay facing east.  Yesterday was one of those beautiful sunny days on the Bay!
Taken from the Southwestern side of the Bay, although not clear, show the mountains around Santa Cruz!

A beautiful Cypress Tree right on the ocean front!


Monterey Harbor and Fisherman's Wharf.


So why ever move from such a beautiful place?   With the year round temperature average of 65 to 68 degrees, mostly foggy, almost always damp weather?  I mean - in the winter, when much of the country is freezing their toes off, and in the summer, others could fry eggs on the sidewalk, everyone loves the Coastal areas! 
 
Well, we move because we found another beautiful place to live - El Paseo de Robles.  We actually have seasons and we love it.  We have nice hot summers, with some days well over 100, and some freezing temperatures during the winter.  But for the most part, we have a little piece of heaven here on earth, and we love it.  We're still close to the beach, should we want to go - 40 minutes or so.  Close to the National Forests, just a couple of hours.  We still live in the Salad Bowl of the World, so our produce is wonderful!
 
So for now, we're Californians, and will stay in California.  Always?  Probably not ~ not to a snowy area though as my Sweetie grew up around the Boston area and says he will never shovel snow again, it's why he moved to California.  For now, here we are.   In the "new" wine country!  he he he!
 
Have a wonderful Sunday, and a wonderful new week!
Blessings,
Donna

Thursday, March 22, 2012

They're Baaack!

Here it is the third week in March, and our Hummingbirds have come home!  Well, probably not all of them - but they are beginning their migration north and we couldn't be happier!  These are our only pets, well almost only - there are these guys that take delight in walking up and scaring the socks off me.
That's him, hiding behing the dog's ear, over on the rock!  Yep, they get me everytime I walk outside.  Everyone knows if they hear me scream it's just only of my little friends sneaking up on me - guess I'd better stop that in case there's a real emergency! 

These are the ones I'm so happy to see!  This is a male youngling or a female because of the lack of color and small size.  This is the first one I could catch on camera this morning!   We saw a feeder on the neighbor's tree last week, but, we were expecting a freeze last weekend, which we did get, and I don't want to find my pet's "feet up" below the feeder!  We aren't expecting any more freezing weather this season, after all, it is almost the first of April!

So, yesterday afternoon, we decided to just put up two cups to see if they were really around - we didn't see one bird yesterday!  But this morning, my Sweetie yelled to me, "Our birds are back!"  I got the camera ready so I'd catch them when they came in.  Those little guys are fast! 

Here's another species, a male, and he does look like a mature bird.  Look at the black around his throat!  He could actually be a "Black-Chinned" Hummingbird.
This one could be an "Anna's or Allen's Female" as they are near the coast all year - and come inland during the warmer periods.  It is early for the females.  Or if it is a migrating bird, maybe ?? 

See the one sitting in the bushes!  Find the knot in the wooden fence and go straight down to the top of the bush - see her!!  Wish I was better at identifying - this does look to be an Allen's Female!! 

 This looks to be another "Black Chinned" bird, and this one is a mature male.  See on the side of his neck how pretty his purple iridescence is?!  SEE??  Sweet!!


Later in the afternoon came an "Anna's" mature male. Look at this color!!   Look at the beautiful head and neck and the ROSE iridescence of this bird's head and neck - and the one above, with just the spot on his neck, is purple.  I hope you can see them clearly enough!

While they are migrating and just checking out territories they still share the nectar.  Once the nests are built and eggs are laid, they can try to keep others away.  Kind of hard when there are hundreds visiting our yard though!

Oh,  guess who else came to breakfast?  No, not that cat!  An Oriole!  I saw just one last year that was the brightest yellow, and then this morning.  It looked around a bit, then left after about 5 minutes.  Every time I lifted the camera, it would turn it's back to me, camera down, turned back around.  After a few minutes of this I lost my patience, so you'll just have to take me at my word on that visitor!

Tomorrow is Friday, so I wish you all a blessed weekend!
Donna

Sunday, March 18, 2012

Unusual Items To Re-purpose For Cards and Scrapbooks

I try to 'repurpose' as many items as possible.  Re-purposing is a fancy way to say "Recycling" but we don't have to use government standards to label items . . . yet.

I've shown in a few of my cards, scrapbooks and albums, my pocket pouches I use to put tags for journaling, photos or just pretty tags inside.  This is not my original idea, I don't know who's it is, but it's great and has been around for many years.  First saw it about 10 years ago.  It's a perfect size, easy to cover and decorate, and FREE - so can't beat that!  Last week when I posted my Anniversary Book for friends I had a couple of requests to explain how to do this - so here are the easy peasy directions.


First, save the rolls from your toilet paper - brand doesn't matter.  The only thing required here is thinking ahead.  I've also used empty paper towel rolls and cut them to size.
Next, I use the first of two high tech gadgets for this project - an old (but cleaned before using on paper crafts) toothbrush!  Pick off as much of the big pieces, then gently brush off the remaining paper.

 Mark where the ends of the roll meets and make sure they aren't on the fold, gently press down.  I have arthritis in my hands and wrists pretty bad, so this is where I use my second high tech gadget ~ an old rolling pin to get a nice crease in the cardboard!


Well, it gives a nice crease, but I need for it to go from this (top) to this (bottom,) what's a scrapper to do?
We improvise!  Now, this is not the only time I use an iron - in fact, this is my craft iron and craft board!

Use a hot setting, but not on steam - NO WATER  on the paper and you will want to press hard and quickly because remember, this is paper!!  So press for a few seconds, pick up the iron, another few seconds until you have a nice flat pocket and no longer a tube.  "Why not go right from brushing off the paper to the ironing step?"  Great question!  There is 1 out of every 4 tubes that need a tad of glue on the inside and if you just go for the big squish and go from taking 4 minutes to 2 minutes (this is really very quick to do!) chances are you will end up with more that need gluing and it is so much easier to glue them before they are flat!  And, for gluing, I use an ever so tiny dab of glossy accents.  Use whatever you use, but only a very small amount, let dry and then move to the next steps.
 So ~ here we are ~ time to have fun!!
I usually have enough made up in advance to put pockets in cards when needed or make little scrap books.

 
Measure roll, mine are 4 1/4" x 6" by the time you roll it around.


I love my Xyron for this step or even spray adhesive, glue or tape ~ whatever you have and use. Roll the tube, carefully aligning the paper and the tube.  I use my high tech rolling pin again to make sure all of the air bubbles are out of the adhesive and it is on good and tight!

Before decorating, I  punch the holes in the tube.  If I'm making a TP Album, I use my Zutter Bind It All.  In a Book or card for a pocket, I would use my Crop A Dile or a hole punch.

This was my first tutorial!  I hope it made sense, and you are able to make your own pockets and Mini Albums!  I had a lot of fun!  Thanks so much for popping by!

Blessings,
Donna

Saturday, March 17, 2012

Home Made Chicken Pot Pies! mmm...

Oh my, with all of the problems I've been having with my teeth we've been eating a lot of chicken soup!!  Nutritious but boring after the first week!  We've been trying to change it up a bit, and oh my - this was delicious!!!

Home Made Chicken Pot Pies!!
This was super easy to make and so yummy!  The only thing I will do differently the next time I make them is make my pot pies smaller.  While this was fine for my Sweetie, it was too much for me!  Since we are on a weight loss plan, I weigh all of my recipes as they are being made, they are then entered into a data bank on "My Fitness Pal" and we are able to track our calories each day.  Here's my recipe, feel free to change it to your liking.

Pot Pie Ingredients
1/2 oz butter
1/4 large onion 3 oz
1 large celery stock 1 3/4 oz
5 oz baby carrots 
4 small red potatoes 8 to 9 oz
8 oz cooked chicken breast
16 oz chicken stock
3 TBS or 1 pkg poultry gravy mix

Bisquick Crust (or what ever you like)
1 2/3 cup mix
2 egg whites
1 cup milk (I use Rice Milk - use your preference)

Chop onions, carrots, celery and potatoes into small pieces - not minced, not chunks - you want to have a nice bite of everything on the spoon!


In a small stock pot, throw in the butter and saute the onions lightly. 


Add stock, carrots and celery, bring to boil and simmer 30 minutes or so. 

Chop potatoes and chicken -
- add to pot and continue cooking 30 additional minutes.
 
Add gravy mix to thicken (this does thicken a bit more in the oven.)  Measure 1 1/2 to 2 cups in four individual baking dishes or all in to one 2 quart baking dish  -  preheat oven to 350 degrees.
 
Mix crust ingredients - if using Bisquik - DO NOT MIX BEFORE THIS STAGE - mix will be a bit loose, spoon over dishes evenly. 
 
Bake 30 minutes, remove from oven and let cool for about 10 minutes.  
Now, enjoy this yumminess!!

I love cooking, and if there are any changes you want to make, do them! 

We all like different things, which is the best part of cooking, making a recipe our own.  The chicken stock I used was from a huge pot of soup I made the day before.  I set aside 1quart of broth from my stock pot.  I buy half breast, bone in, skin on, chicken, boil water with reduced sodium chicken base and chicken breasts first for an hour or two, strain liquid to remove all of the chicken and bones.  Then debone, chunk chicken - then add vegies and start soup with broth.  I often make more broth than needed for additional recipes during the week.  It's just easier for me, but you do it what ever way fits your lifestyle!

Blessings,
Donna

Friday, March 16, 2012

Our Baby Peach Tree Is Beautiful!

Wow - with Spring being early, and no Winter to speak of (well, we did get really cold, but no rain - which is desperately needed all over California!) our baby peach tree is in full bloom!

Well, I did say it was a baby peach tree!  It's all of - maybe, 2' tall!  I remember it having a few more branches on it, but maybe not.  Our gardeners are really good at trimming everything when I ask the them, and we might have had a slight miscommunication about not cutting the tree, and only cutting the Star Jasmin! 

 No worries though, this little gal will do just fine and may just have a few peaches this year! 


We are getting ready for a big storm tonight and tomorrow, and I thought maybe we'd loose some of these beauties in the rain!


Blessings for a wonderful weekend!
Donna